How to Bond Metal to Metal without Welding (Quick & Easy)
Last Updated on
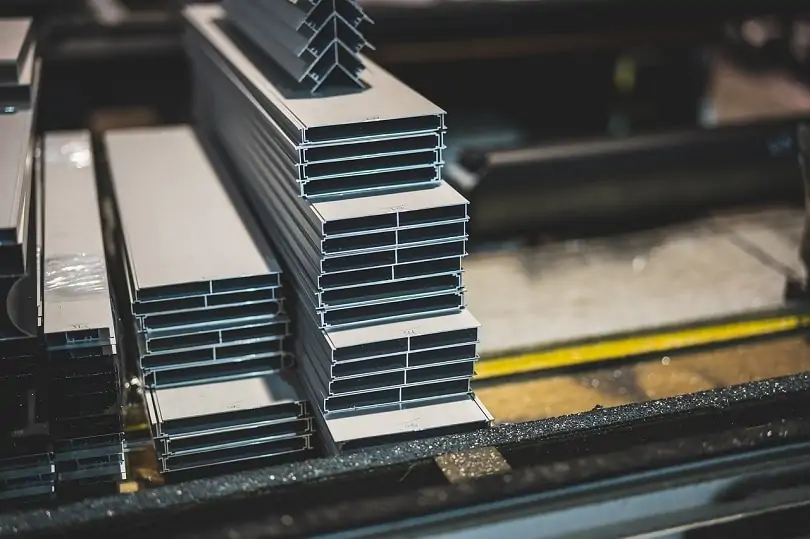
When you’re working with metal, joining together two different pieces might become necessary. Welding is the most logical answer to this dilemma but it isn’t always the best choice or the most viable one. Here, we will introduce some other ways to bond metal to metal without welding.
You might be surprised at the number of techniques that provide an alternative to welding. There are adhesives as well as processes that require expertise and equipment. Most of these options aren’t as risky as welding. So, they might be the perfect path for a beginner or novice.
You’d probably do well to consider the following options other than welding:
Glue
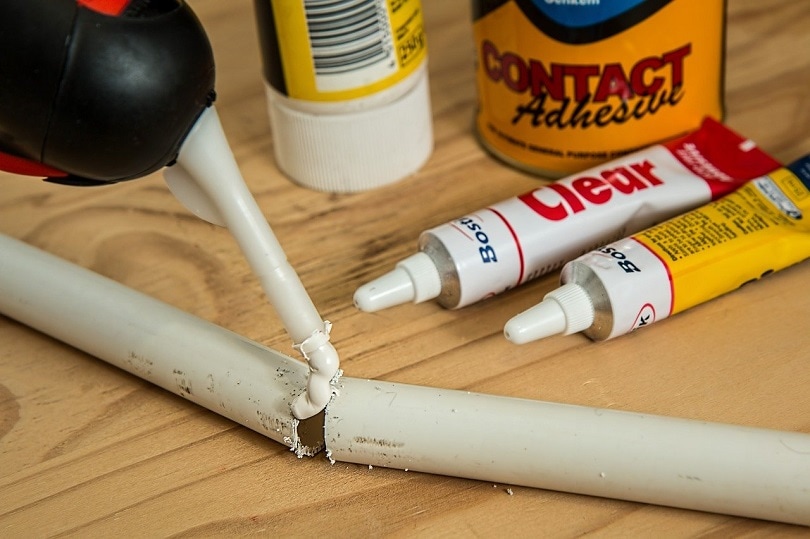
The simplest means of joining two pieces of material together is to use glue. Just about anyone can spread some glue on a couple of surfaces and slap them together. However, there are several factors at work here, such as the strength and type of glue, holding the metals under pressure until the whole thing dries, and so on.
How to Bond Metal To Metal With Glue
It’s quite easy to bond two pieces of metal with glue as long as you have the right kind of metal glue and a bit of time. Here are some step-by-step guidelines.
- Make sure you’re working in a workshop or any area with decent ventilation. There should also be enough space to place and handle everything you need. Put down some newspaper of protective cloths, making sure to cover up any nearby furniture.
- Next, look closely at the parts that have to be glued together. Test to see if they will fit together just right. Clear up the places where you have to put the glue, such as particles of dust, fragments of cloth, or the remnants of any adhesive.
- You should also be careful to wear protective gloves made of either nitrile or latex. PVC, cotton, or nylon won’t be enough as you’re working with metal glue.
Instructions
You can now start with the following steps:
Cleaning
The surfaces where the glue goes should be dry, clean, and ideally, a little rough. Do away with any grease, oily, wax, dirt, or dust. Use a cloth to wipe off fingerprints as well. If the surface is too smooth, consider roughening them up with some sandpaper.
Applying the glue
Read the instructions on the tube of glue. This will inform you of the correct application methods and the length of drying time required.
Open the cap and use a brush or spatula to apply the glue on both surfaces. Epoxy metal glue might require some mixing while superglue might only require you to put a single drop on each square inch.
Joining the metal pieces
Position the two pieces and press them together tight. Make sure there are no gaps in between. Press them for a few minutes, and then, leave them undisturbed for as long as the instructions say.
Clamping and curing
Keep in mind that metal epoxies usually need clamping for around an hour. Their curing ties are longer as compared to superglues and polyurethanes. However, clamping is still recommended for the latter if you want a strong bond. For a complete bond, leave the glued parts undisturbed overnight.
Brazing

The brazing method means using a sort of filler metal to connect two metal parts together. The filler metal is heated at a temperature of over 800 degrees. While this method is like welding, it’s less costly. Plus, it’s more like using an adhesive rather than melting the metal pieces themselves. For this reason, we still consider it a method to bond metal to metal without welding.
How to Bond Metal To Metal With Brazing
- Make sure of a good fit: the connection between the two base metals should be clear to allow for effective capillary action
- Clean metals: clean metal surfaces are essential for proper brazing. So, remove grease and oil first, and then, get rid of the rust, if any.
- Flux: Use the chemical compound called flux on joint surfaces prior to brazing so that there are no oxides forming
- Assembly: Hold the parts in the right position of brazing, using gravity if their shapes permit it
- Brazing the assembly: heat the assembly first to the brazing temperature and put the filler metal in the joint
- Cleaning up: clean the assembly after brazing, as most fluxes can be cursive; this includes cleaning the flux resides as well as the oxide scale
Soldering
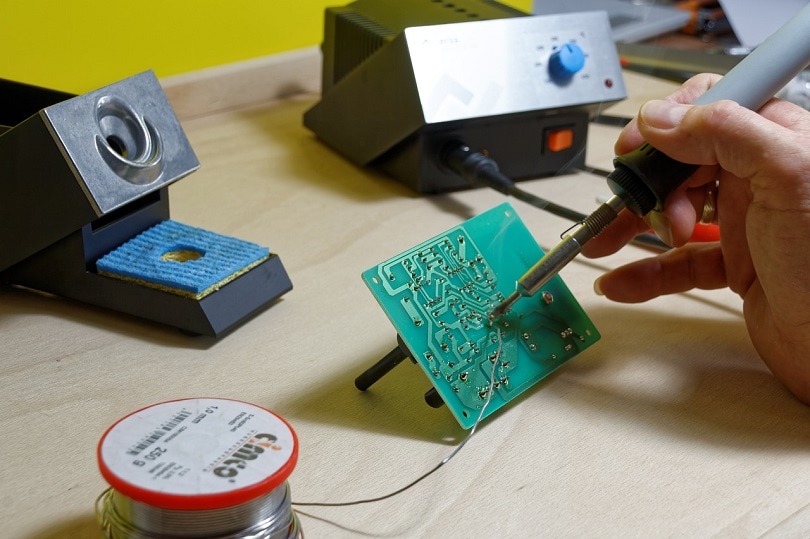
Soldering is similar to the welding process and is widely utilized in making circuit boards, electronics, and similar items. The main difference between this and welding is that the latter requires the formation of a mechanical connection. Soldering requires an electric connection between the metals we’re joining.
Solder is the main material used in the soldering process. This is fairly easy to melt, as it’s usually made wholly of tin (at least 99 percent) and contributes to the electric connection we need. In addition to the tin, there might also be other metals inside the solder such as silver, zinc, and copper. Since the soldering alloy melts at a relatively low temperature, it doesn’t require as much heat as the welding process.
How to Bond Metal To Metal With The Soldering Technique
Here’s a brief look at how to solder two metal pieces together:
Collect the material
- A soldering iron
- Damp sponge
- Flux
- Brush
- Sandpaper
- Solder
- Damp cloth
- Safety glasses
- Protective gloves
- Painter’s tape
Steps:
- Plug the iron in and give it time to heat up. While it’s healing, sand down the metal edges where you have to join them. The surface should be as smooth as possible so that the pieces can connect without gaps.
- Clean the areas, and then, use painter’s tape to cover any places where you don’t want to solder to go. Put flux on the places where the solder will go.
- Set up your workstation, making sure there’s a bit of distance between you and the soldier at all times.
- Put on your safety glasses and wear gloves if needed
- Start the soldering process
- Let the metal cool after the process
- Scrap off the excess solder after the whole thing has cooled down
Riveting
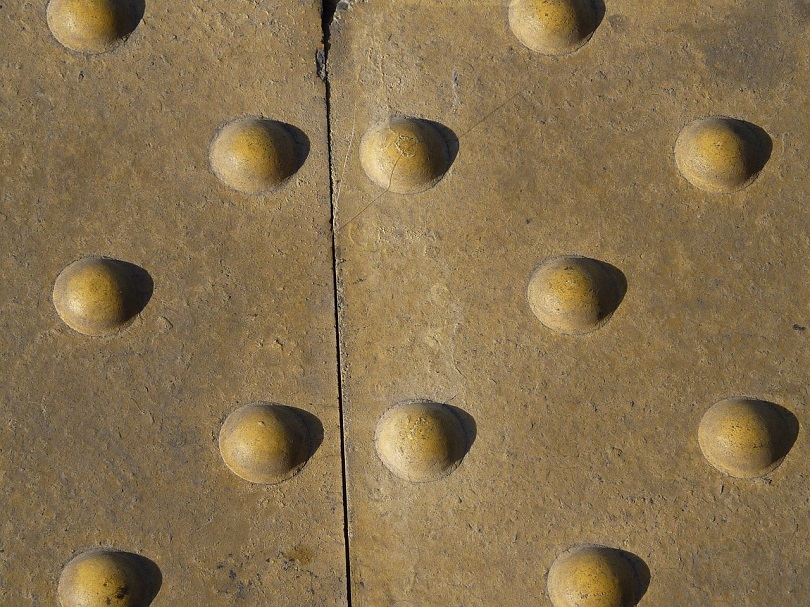
Riveting is used to connect two heavy section metal pieces together. One might use it to connect pieces in tankers, boilers, wagons, bridges, etc. The four kinds of riveting include double riveting, single riveting, zigzag riveting, and chain riveting.
How to Bond Metal To Metal With Riveting
- The plates should have punched holes (when you’re using light gauge sheets) or drilled ones (for heavy section pieces)
- There should be a burr left after each drilling operation
- The metal pieces have to firmly held together
- A rivet is put inside each hole one at a time.
- After inserting, strike the rivet hard so that its head straightens out
- Leave the pieces to cool, which will cause the rivets to pull them close together
Final Thoughts
Welding might be a sturdy and reliable way of bonding two pieces of metal. However, it’s not necessary all the time and its cons might prevent us from making such a choice. If you’ve been looking for an alternative to welding to bond metal to metal, the discussion above should have given you a load of ideas now.
Some of the methods we’ve covered might still be complicated but most are still easier than welding. Most of them also don’t require special experience or training. They also cost a fair bit less. So, take your pick and choose the perfect process for your next metalworking project!
If you need to do other bonding work without welding, check out some of our other how-to guides below: